How to Compress WebP Images to Speed Up Your WordPress Website
If you run a WordPress blog, an online store, a SaaS landing page, or a portfolio site, you already know the golden rule: speed is everything. When a page takes more than about three seconds to load, a large share of mobile visitors give up and hit the back button. And Google uses page load speed — specifically Core Web Vitals — as a real ranking factor, so a slow site quietly costs you rankings, traffic, and sales. Heavy images are usually the single biggest culprit.
A single oversized banner or a gallery of full-resolution photos can add several megabytes to a page that should weigh a few hundred kilobytes — and every one of those megabytes is bandwidth your visitor's phone has to pull down before the page settles.
The Rise and Dominance of the WebP Format
For over two decades, web developers and content creators relied strictly on JPEG for high-color photographs and PNG for transparent graphics and logos. However, Google recognized the need for a faster web and introduced a revolutionary "Next-Gen" image format called WebP. WebP provides vastly superior lossless and lossy compression for images on the web compared to its predecessors.
It essentially offers the high-color quality of a standard JPEG and the crisp transparency of a PNG, but routinely at a noticeably smaller file size for the same visible quality. Because of this massive performance boost, almost all modern browsers (Chrome, Safari, Edge, Firefox) now fully support and encourage the WebP format.
Why You Still Need to Compress WebP Files
A common misconception among beginner webmasters is that simply converting an image to WebP is enough. While WebP is naturally smaller than JPG, a raw WebP export from design software can still be unnecessarily large (e.g., 500KB or 1MB). To push your PageSpeed Insights score up into the green, you have to take it a step further: you need to aggressively compress those WebP files before they ever touch your server.
While WordPress has dozens of plugins (like Smush or Imagify) that attempt to optimize images on the fly, they often bloat your database, slow down your server's CPU during the conversion process, and sometimes charge expensive monthly API credits. The ultimate best practice for frontend optimization is to compress your images locally before you ever upload them to your WordPress Media Library.
Step-by-Step Guide to WebP Compression:
- Step 1: Gather Your Assets. Collect all the hero banners, blog thumbnails, and product images you intend to upload to your website.
- Step 2: Navigate to the Tool. Open the Compress WebP tool on GoPDFGo. Because our platform is designed to run entirely in your browser, the compression engine loads instantly in your browser.
- Step 3: Upload Securely. Drag and drop your WebP files. Our completely client-side architecture handles the files locally. You are not waiting for heavy files to upload to a remote server, which saves you massive amounts of time.
- Step 4: Optimize and Compress. Click the compress button. The advanced algorithm will intelligently reduce the file footprint by discarding invisible metadata and optimizing visual data arrays that the human eye simply cannot perceive.
- Step 5: Download and Deploy. Save the significantly lighter, web-ready WebP images to your desktop and upload them directly into your WordPress dashboard for maximum site speed.
Troubleshooting Format Issues
What if you haven't made the architectural switch to WebP yet, and all your current raw assets are sitting in standard JPG or PNG formats? You can easily modernize your workflow without buying new software. Before attempting to compress, use our conversion utility tools. You can effortlessly transform your existing heavy assets using our Convert to WebP tool. Once successfully converted, you can then run them through the compressor for maximum efficiency.
Conversely, if you downloaded a WebP image from the internet as a reference, but your offline editing software or an older version of Photoshop refuses to open the "unsupported format," you can always revert it back to a legacy format in seconds using our WebP to JPG or WebP to PNG converters.
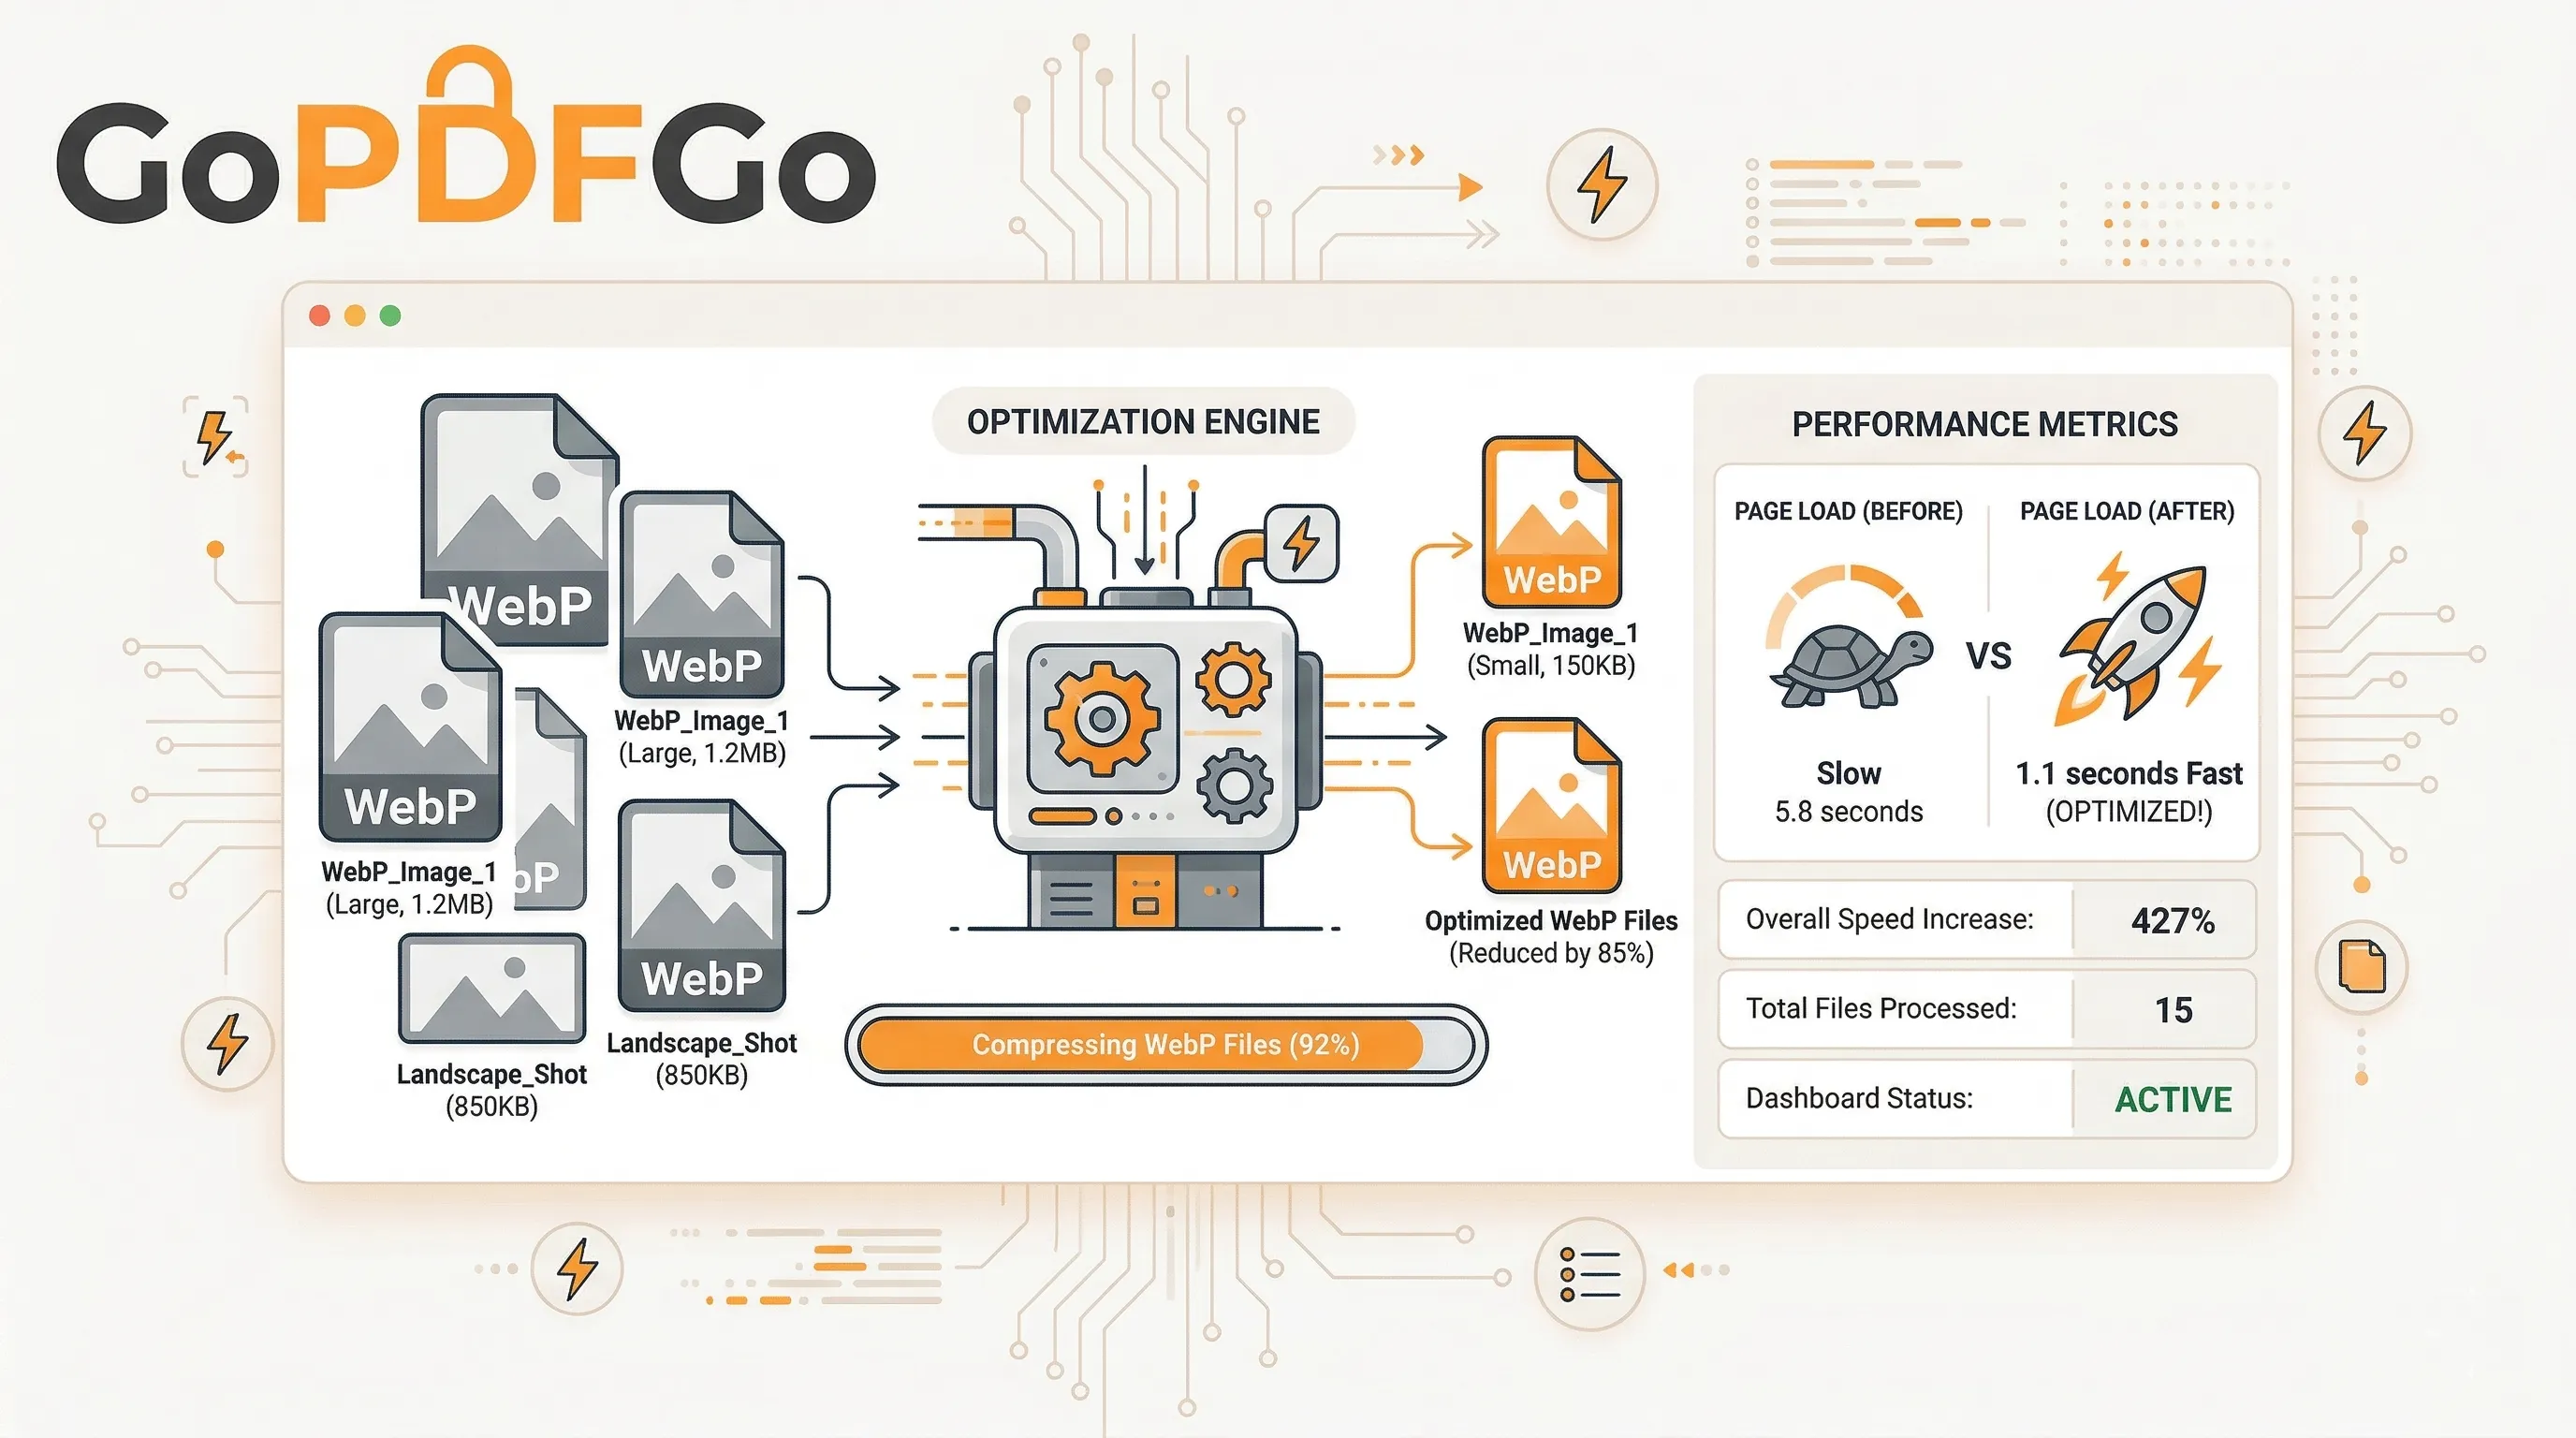
That One Giant Hero Image Is Killing Your LCP
Core Web Vitals sounds like jargon until you open the report and see Largest Contentful Paint (LCP) flashing red. LCP is just the time it takes for the biggest visible thing on your page to finish loading. On most sites, that biggest thing is the hero banner at the top. So if your hero is a 900KB WebP, the browser has to pull all 900KB down and decode it before LCP even counts as "done".
Google wants LCP under 2.5 seconds. On a decent home WiFi you might scrape past that. But your reader on a 4G connection in a moving local train, with two bars of signal, is staring at a blank box while that fat image trickles in. Shave the hero down to 120KB and LCP often drops by a full second or more. That single number is what tips you from a yellow score to a green one, and Google notices green scores.
Finding the Quality Sweet Spot (Not Just "Maximum Compression")
People assume smaller is always better and slam the quality slider to the floor. Bad idea. Crush a WebP too hard and you get muddy gradients, blocky skies, and that smeared look around text in a screenshot. The reader may not name it, but the page feels cheap.
The honest sweet spot for most photos sits somewhere around 70 to 80 quality. At that level the file is tiny and your eye genuinely can't tell it apart from the original. The smart move on the Compress WebP tool is to nudge the slider, watch the live preview and the new file size, and stop the moment the picture starts looking off. When you have a hard ceiling to hit, like a CDN or a theme that flat-out rejects anything above 200KB, use the target-size mode instead. You type the size you want, the tool works backwards to get there, and you skip the guess-and-check entirely.
Fixing an Old Media Library Without Redoing Every Post
Most of us don't start optimising on day one. You wake up two years and 400 posts later with a Media Library full of 2MB phone snaps. Re-uploading each one by hand is a punishment nobody deserves.
Do it in batches instead. Export a chunk of your heaviest originals, drop them all into the compressor at once, let it chew through the lot, and re-upload the lighter versions over the old slugs. A few things make this less painful:
- Hit the biggest offenders first. Sort your library by file size and start at the top. The 2MB monsters give you the most speed back per file fixed.
- Still stuck on JPG or PNG? Run them through Convert to WebP first, then compress. Two quick passes, much smaller result.
- Resize before you compress. A photo displayed at 800px wide doesn't need to be 4000px. Trim the dimensions with Resize and the file shrinks before the compressor even touches it.
Mobile Visitors Won't Wait, and That's Most of Your Traffic
Check your analytics. For nearly every Indian site, well over half the traffic is on a phone, often on patchy mobile data, not fibre. Those readers are the least patient and the quickest to bounce. A heavy page doesn't just annoy them, it actively burns their data pack, and people remember the site that ate 15MB to show one article.
Lighter images are the cheapest fix you have for mobile bounce rate. No new theme, no caching plugin you'll need a tutorial to configure. Just smaller files going out the door. When the page snaps into view on a weak signal, people actually stay and read, and that longer session is exactly the signal Google rewards.
By strictly incorporating manual WebP compression into your daily content publishing routine, you will ensure a lightning-fast, highly SEO-friendly website that keeps both your human users and Google's crawling bots incredibly happy.
Frequently Asked Questions
Q: How do I compress WebP images for my WordPress site?
A: Open the Compress WebP tool, drop in your images, set the quality (around 80% is ideal for web), and download the lighter files.
Q: Can I force each image under a specific KB size?
A: Yes. Switch to Target Size (KB) mode and pick a cap like 100KB so every image lands under your performance budget.
Q: Does compressing WebP keep the transparent background?
A: Yes. Our WebP compressor preserves the alpha channel, so logos and cutouts stay transparent.
Q: Is it safe to compress client or unreleased assets?
A: Yes. Everything is processed inside your browser on your own machine — no image is ever uploaded to a server.