Remove Unwanted Edges: How to Crop Scanned Documents Online
Using your smartphone camera as an everyday document scanner is genuinely handy. With modern high-resolution mobile lenses, you can digitize handwritten lecture notes, legal contracts, identity cards, and business receipts in a matter of seconds. However, this high-speed convenience often comes with a very messy and unprofessional side effect: capturing unwanted, distracting backgrounds.
When you hurriedly place a document on a table or your bed to take a quick photograph, your camera lens inevitably captures the wider environment around the paper's edges. You end up with a high-definition picture of your important document entirely surrounded by wooden table textures, your floral bedsheet, harsh room shadows, or even the tips of your own fingers holding the paper flat against the curling breeze.
If you take this raw, unedited image and immediately convert it straight into a PDF, or upload it as an official ID proof for a job application or bank KYC, it looks highly unprofessional, sloppy, and reflects poorly on your attention to detail.
Why Precise Cropping is Essential for Document Professionalism
Cropping a scanned document isn't just about making the image look aesthetically pleasing; it serves several critical, practical, and technical purposes in the digital world:
- Drastically Reduces File Size: Every single pixel of your wooden desk or bedsheet takes up valuable digital data. Cropping out the unnecessary background immediately removes thousands of useless pixels, automatically reducing the overall file size before you even attempt to compress it.
- Greatly Improves OCR Readability: When you crop a document tightly to its actual borders, the text becomes the absolute central focus of the file. This makes it infinitely easier for government officials, bank verification software, or automated OCR (Optical Character Recognition) bots to scan and read your details accurately without getting confused by background patterns.
- Fixes Strict Aspect Ratios: If a recruitment portal explicitly requires you to upload a digital signature that is horizontally wider than it is tall, cropping allows you to cleanly isolate just the ink signature and discard the massive expanse of the blank white page surrounding it.
- Saves Printer Ink: If the person receiving your document needs to print it out for a physical file, a dark, uncropped background (like a dark desk) will waste a massive amount of black printer ink and make the physical copy look terrible.
How to Crop Your Highly Sensitive Documents Safely Online
Many individuals rightly hesitate to use free online photo editing tools for highly sensitive documents (like Aadhaar cards, PAN cards, or signed corporate checks) because they fear their private financial or identity data will be uploaded, stored, and potentially leaked from a public cloud server.
GoPDFGo was engineered to eliminate this privacy worry entirely. Our platform operates on a completely serverless, client-side architecture. This means the image editing software runs locally within the memory of your own web browser. Your private document never actually leaves your computer or phone.
Step-by-Step Guide to Professional Cropping:
- Step 1: Open the Tool. Navigate to the Crop Image tool on your desktop monitor or mobile browser.
- Step 2: Upload Securely. Select the messy, unedited photograph of your document from your local storage.
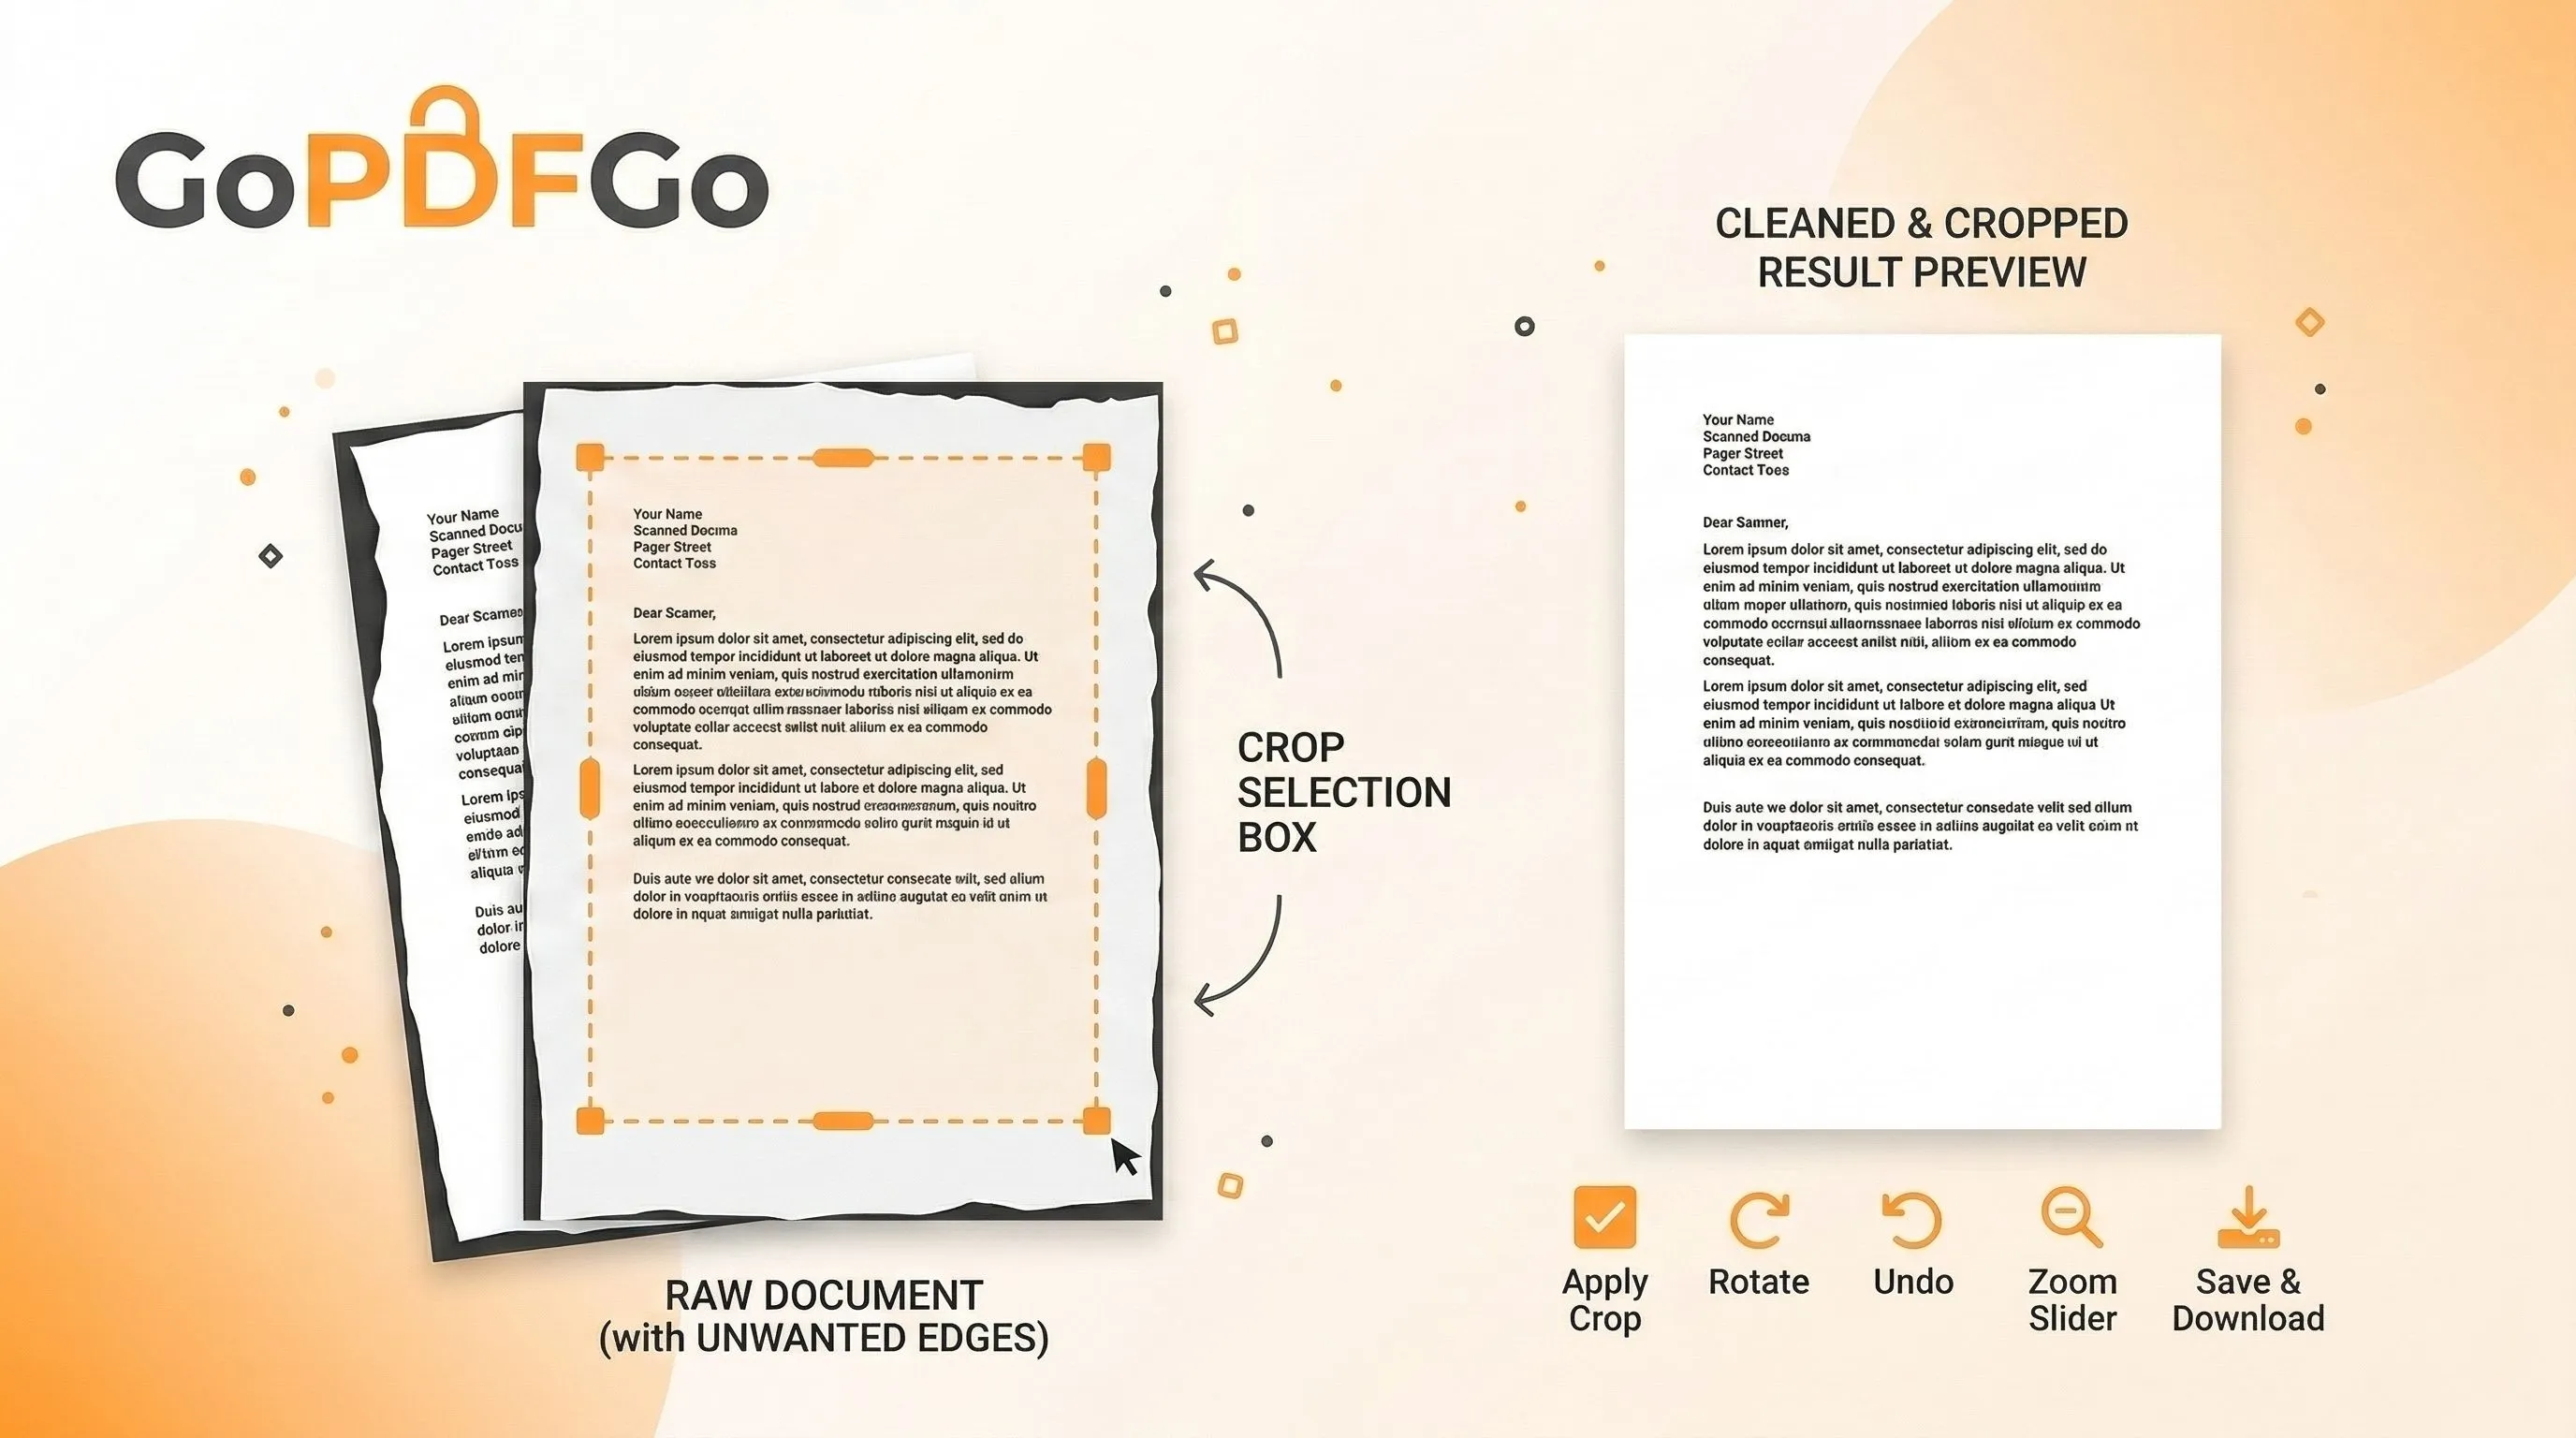
- Step 3: Adjust the Boundary Frame. Once loaded, you will see an interactive, adjustable cropping box overlaying your image. Carefully drag the four corners and edges of the box so that it tightly hugs the actual borders of your paper document, leaving the wooden desk or background completely outside the designated frame.
- Step 4: Apply and Save. Click the primary crop button. The in-browser tool will instantly trim away the excess pixel areas. Download your clean, professional-looking, focused image.
Crucial Next Steps After Cropping
Once your image is cleanly cropped and focused, you have a few excellent options depending on your final end goal:
- If you need to submit this newly cropped image as a formal, multi-page document, you should convert the cropped image file into a standard PDF format using the Image to PDF converter tool.
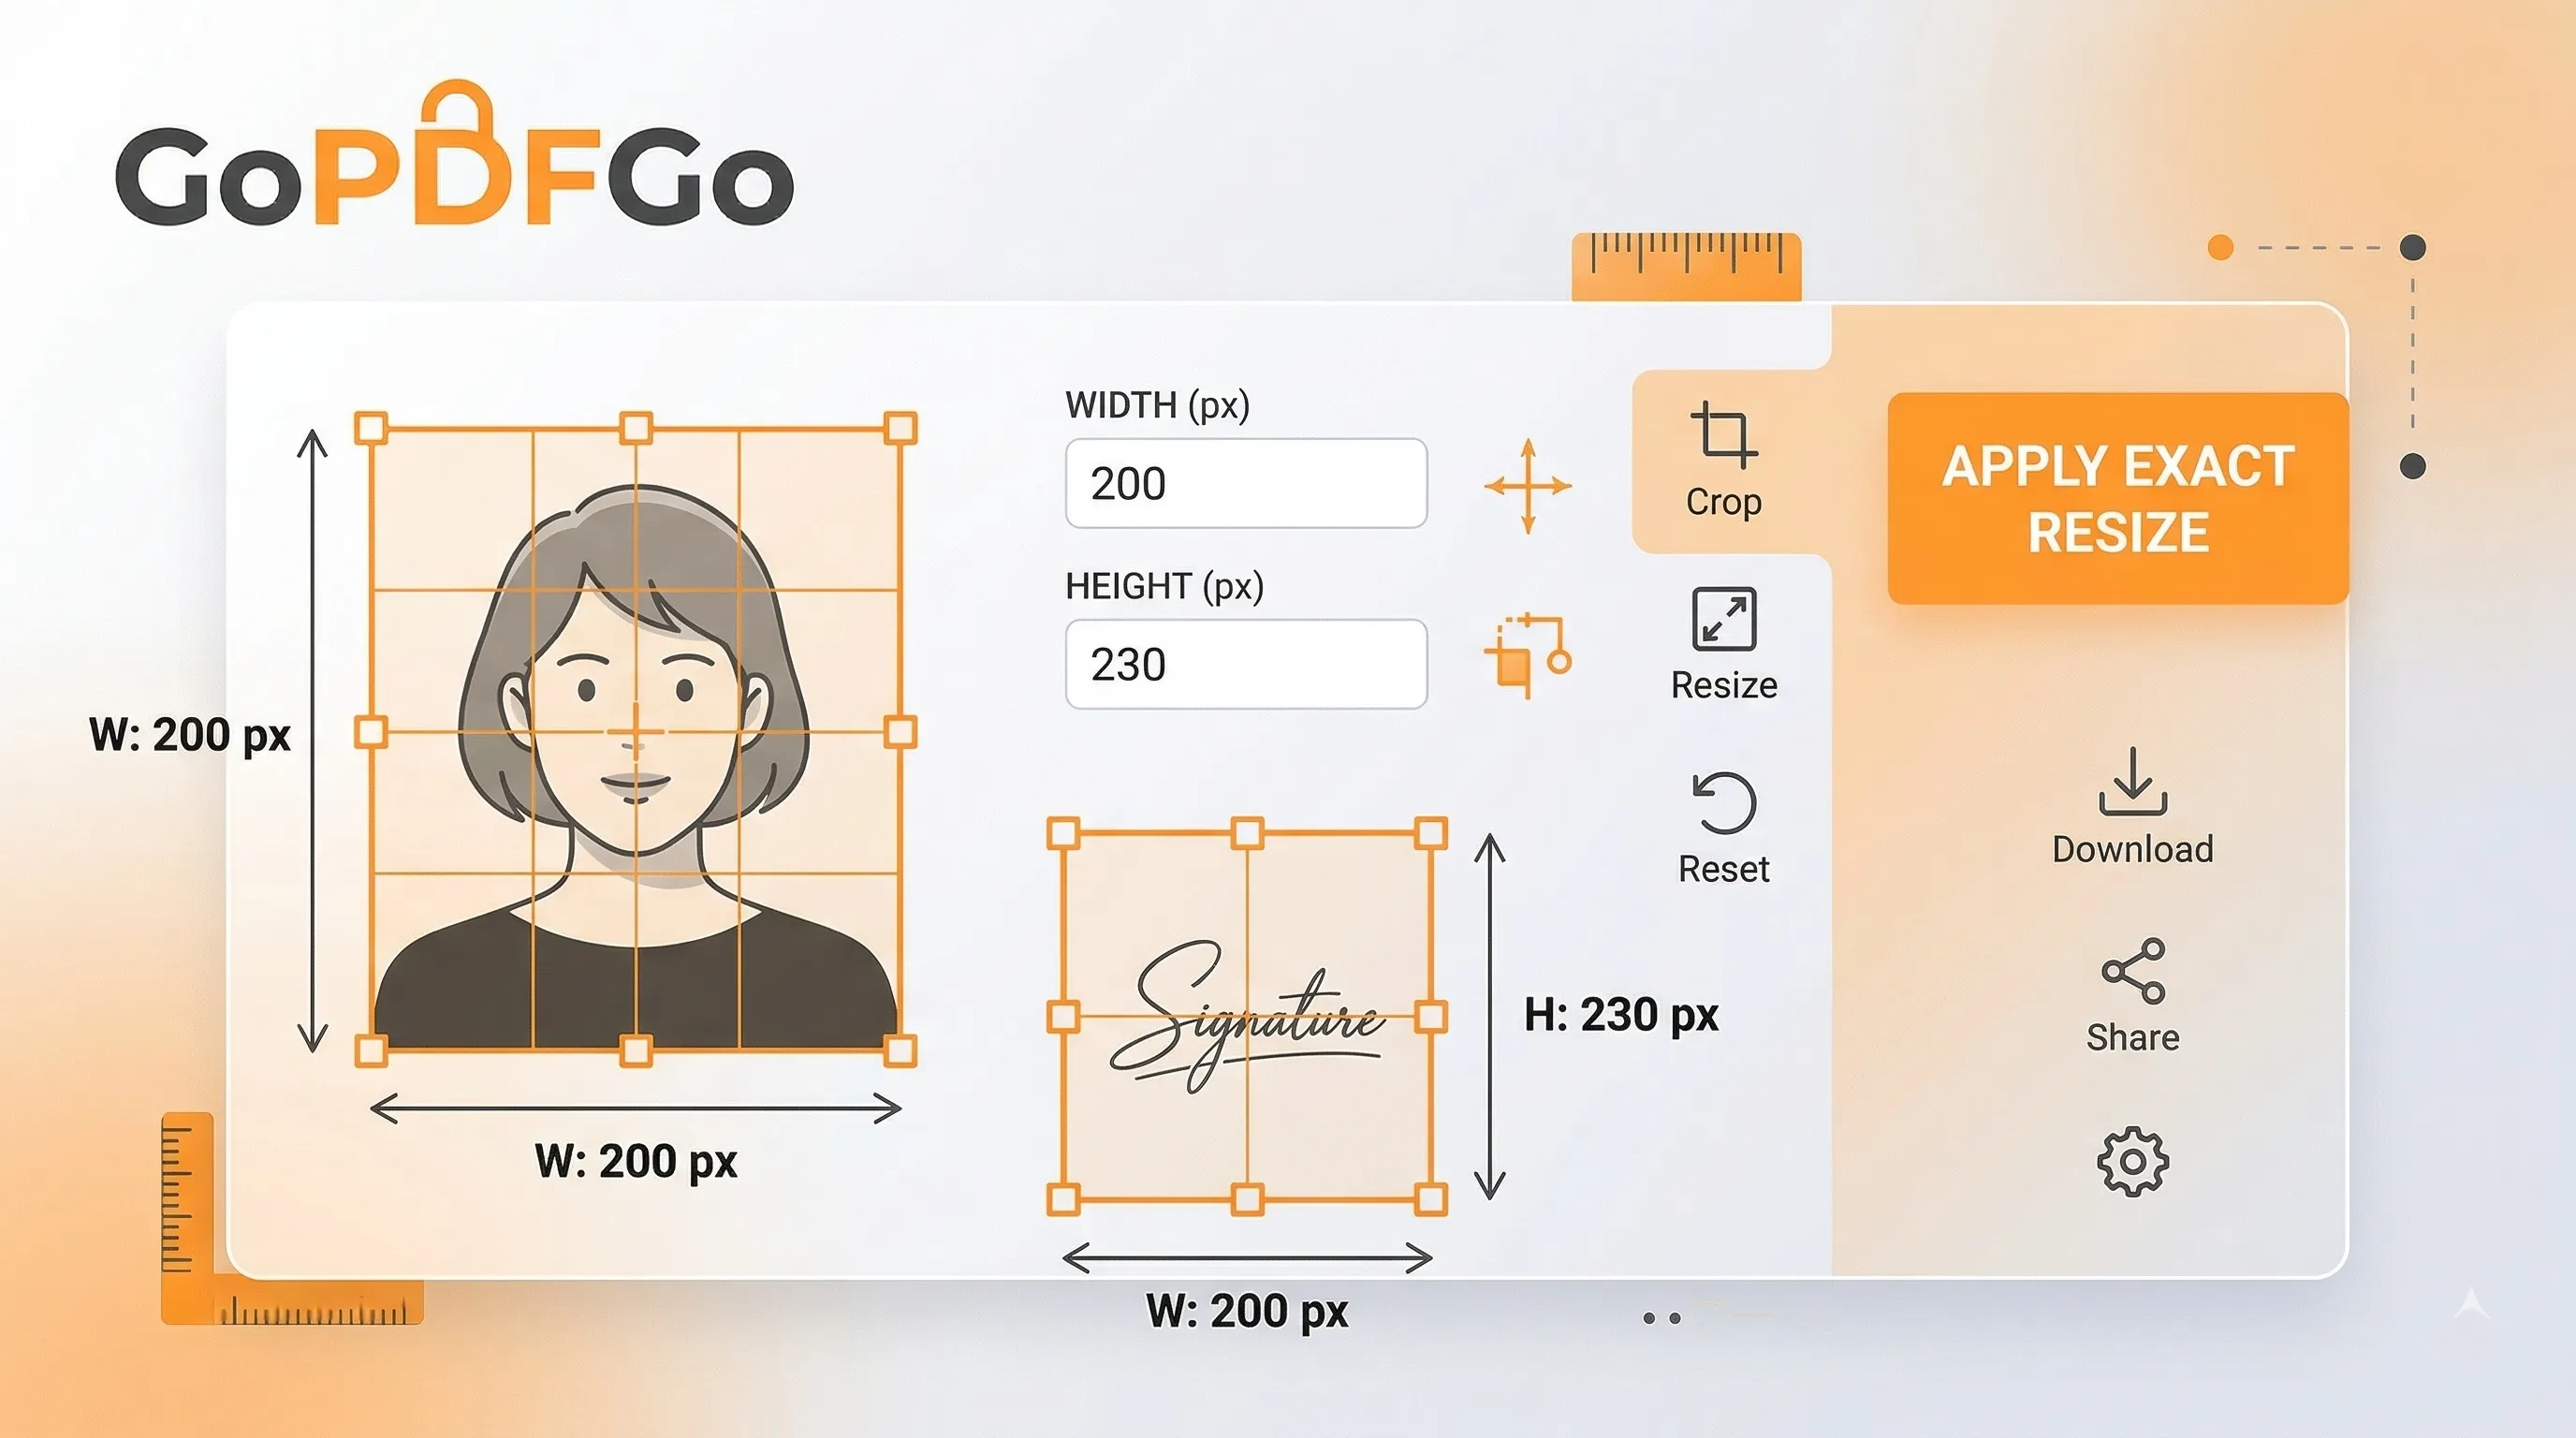
- If the upload portal strictly requires an exact, unchangeable pixel dimension (like a 200x230 pixel passport photo for an SSC or UPSC exam), take your newly cropped, focused image and run it through the Resize Image tool to mathematically hit those exact requirements without warping your face.
Killing the Dark Border, Fingers and Shadow
Here's the part nobody tells you. The ugliest thing in a phone scan usually isn't the desk. It's that thin dark gutter running along one edge where the paper lifts slightly and casts a shadow, plus the blurry pink smudge of your thumb pinning down the corner so the page doesn't curl. Your eye skips over it, but a verifier's eye lands on it instantly.
Drag your crop box inside the shadow line, not on it. Sacrifice two or three millimetres of the genuine white margin if you have to. A clean white edge that's slightly smaller beats a "complete" edge with a grey halo and a fingertip in the frame. Same logic for that curved bottom corner where the page bends away from the camera and goes soft and dark. Just cut it off. Nobody reading your marksheet needs to see the curl.
The goal is a tight rectangle that looks like it came off a flatbed Xerox machine, not off your bed at 11 pm. Get the box hugging the actual printed border and the difference is night and day. If the paper itself sat crooked, finish the job by squaring it up with Rotate Image first, then crop the level version.
Aspect-Ratio Presets for ID and Passport Photos
Free-hand cropping is fine for a notes page. It falls apart the second a portal wants a photo in a fixed shape. Try to eyeball a passport-style headshot by dragging corners and you'll end up with something a hair too wide or too tall, and the upload page will quietly reject it or stretch your face like a funhouse mirror.
This is why the Crop tool ships with aspect-ratio presets. Lock the box to a ratio and it simply won't let you pull it out of shape, no matter how shaky your dragging is. A few real cases where this saves you:
- Square (1:1) for a profile picture or a WhatsApp DP that an HR portal asks for.
- Portrait (3:4 / 4:5) for the classic passport-style headshot that SSC, UPSC and most government exam forms demand.
- Wide (16:9 or wider) for a scanned signature strip, where you want the ink and almost no blank paper around it.
Set the ratio first, then position the locked box over your face or signature, then crop. The shape comes out right on the first try instead of the fourth.
Hitting a Portal's Exact-Dimension Rule
Now the annoying twist. Plenty of Indian portals don't just want a shape, they want exact pixels. Something like "photo must be 200x230 px" or "signature between 10 and 20 KB." Cropping alone won't put a number on your file. What it does is hand you a clean, correctly-shaped image with no junk around it, which is exactly what the resizer needs as input.
So the order matters. Crop to the right ratio with a preset, then send that to Resize Image to nail the precise pixel dimensions. If you skip the crop and resize a photo full of desk and shadow, you're just shrinking the mess. Crop first and the resize lands clean every time, with your face or your signature filling the frame the way the rulebook wants.
A Tight Crop Reads as Credible
There's a softer reason to bother with all this, and it's about trust. A bank KYC officer or an exam-form checker scrolls through hundreds of uploads a day. A scan that's squared off, edge to edge, with no bedsheet and no thumb, registers in half a second as "this person is careful." A tilted shot floating in a sea of wooden table makes them squint, and squinting is how documents get sent back for re-upload.
You're not making art. You're removing every reason for someone to pause and doubt the page. A tight crop quietly says the document is real and the person submitting it pays attention. Once it's cleaned up, roll it into a PDF if the form needs one, and you're done.
Taking just 15 to 20 seconds to properly crop your images before submission completely transforms a lazy, cluttered snapshot into a crisp, authoritative digital document. Take pride in your digital submissions and never upload a photo of your messy desk again!
Frequently Asked Questions
Q: How do I crop the messy edges off a scanned document?
A: Open the Crop Image tool, drag the crop box around just the document, and download a clean, tightly framed image.
Q: Does cropping reduce the file size?
A: Yes. Removing the background pixels means fewer pixels to store, so the file gets lighter before you even compress it.
Q: Can I crop and then resize to an exact size?
A: Yes. Crop first to remove the junk, then send the result to the Resize Image tool to set the exact pixels a form needs.
Q: Is cropping my document private?
A: Completely. It happens inside your browser on your own device — nothing is uploaded.