"Image Too Large" Error? How to Compress JPG under 20KB for Online Forms
If you have recently applied for a highly competitive government job (like SSC, UPSC, or Railway recruitment), a university admission program, a new passport, or a banking examination in India, you know the exact drill. You put on a nice shirt, carefully scan your recent passport-sized photograph, and take a clean picture of your handwritten signature on a blank white piece of paper. You excitedly attempt to upload these critical files to the application portal, and the site immediately throws a harsh red error message on your screen: "Upload Failed: Image file size must be strictly between 10KB and 20KB."
Modern smartphone cameras are absolutely fantastic pieces of technology, but they capture far too much high-definition detail for simple, legacy web forms. A standard photograph taken on a modern iPhone or Android device can easily weigh in at 3MB to 5MB (which translates to roughly 3,000KB to 5,000KB). To meet the portal's strict requirements, you need to shrink that file by almost 99%. Doing this without completely destroying the image is a technical challenge.
Why Do Government Portals Demand Such Tiny Files?
Before you get frustrated at the website, it helps to understand the engineering logic behind these strict limits. Recruitment boards process millions of applications simultaneously. If 5 million students each uploaded a 5MB photograph and a 5MB signature, the government servers would instantly require terabytes of expensive storage and massive bandwidth just to process a single exam's intake. By severely capping the file size to 20KB or 50KB, authorities ensure their databases remain incredibly fast, preventing catastrophic website crashes during the final, high-traffic days of form submission.
The Danger of Taking Screenshots to Reduce Size
When faced with this massive size reduction task, the most common "hack" applicants use is opening the photo in their gallery, zooming out slightly, and taking a screenshot of the photo to reduce its file size. This is a terrible idea for several reasons.
First, taking a screenshot fundamentally alters the aspect ratio and introduces black or white borders around your image. Second, basic mobile compression often results in a highly pixelated, "blocky" image. These portals utilize automated OCR (Optical Character Recognition) software and facial recognition algorithms to verify candidates. If the software cannot clearly recognize your facial features or verify the distinct curves of your signature because the image is too blurry, your application will be rejected instantly during the initial screening phase.
How to Achieve the Perfect Compression Balance
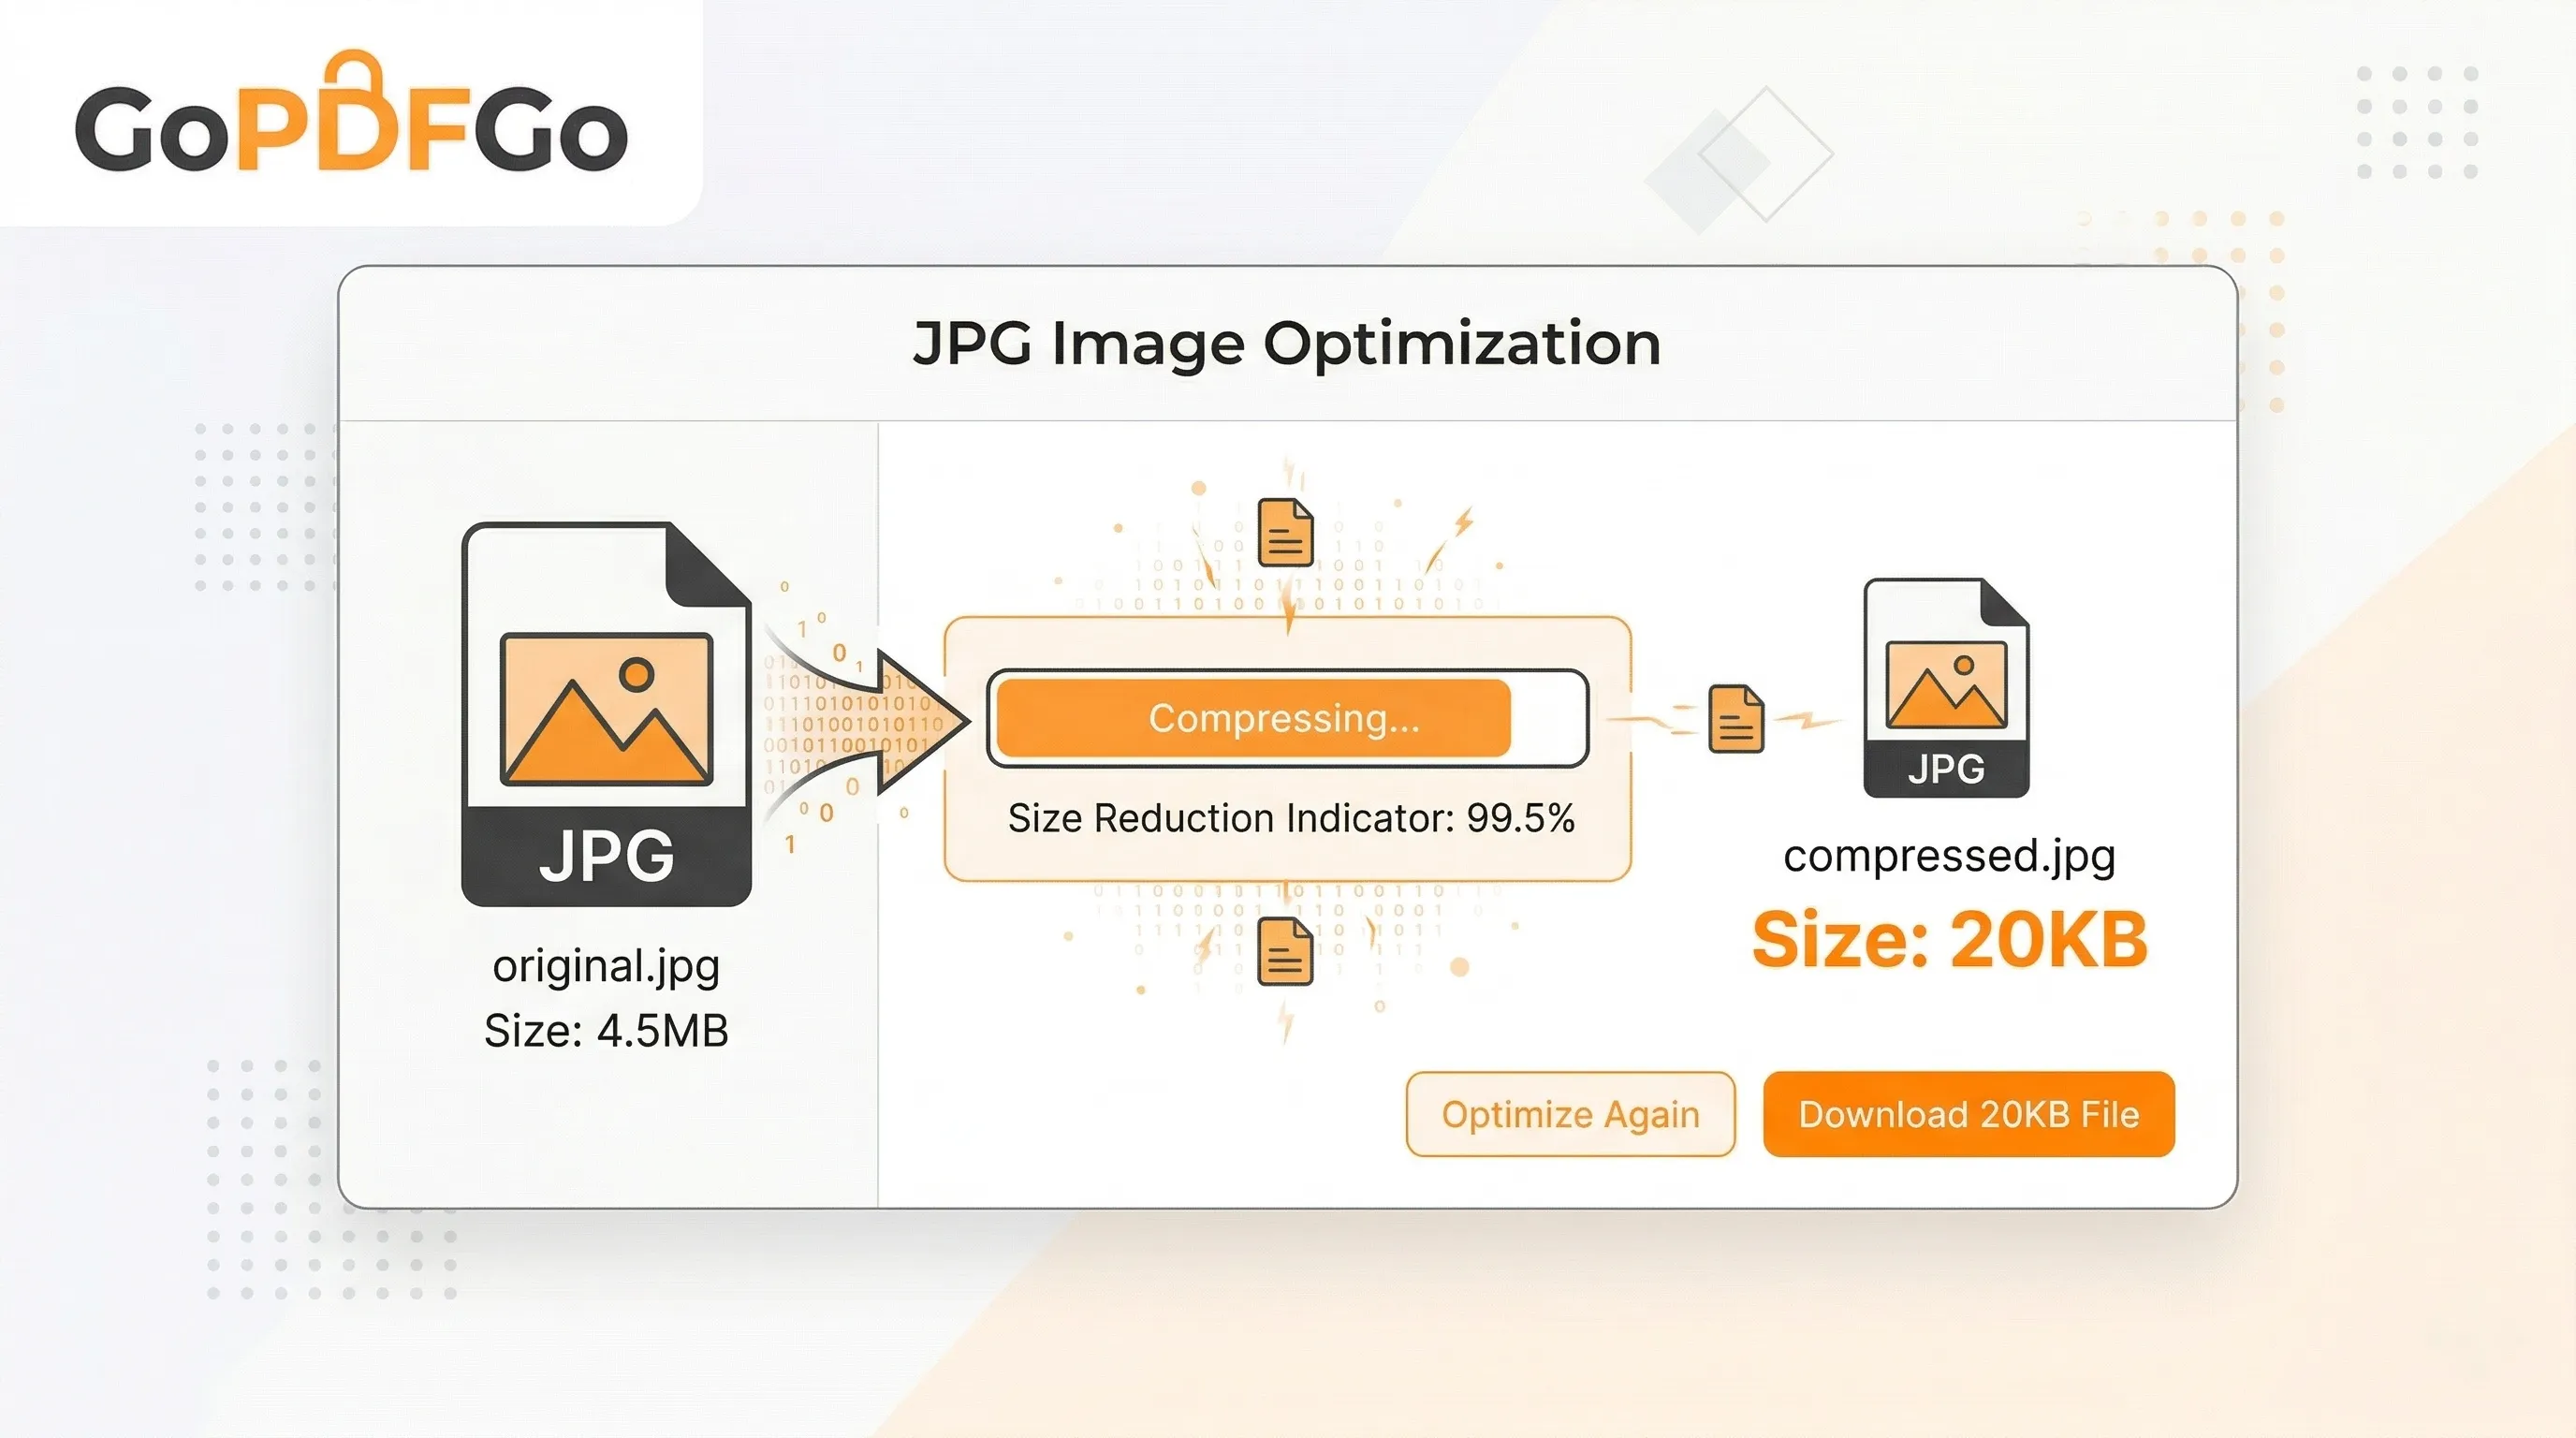
You cannot rely on MS Paint or screenshots. You need a dedicated, purpose-built tool that uses smart algorithms to discard unnecessary background color data and hidden EXIF metadata (like the GPS location of where the photo was taken and the camera model) while meticulously preserving the sharp, high-contrast edges of your face and your ink signature. Here is how you can do it seamlessly.
Step-by-Step Guide to Compressing Your Image:
- Step 1: Access the Tool. Open your web browser and go to the Compress JPG or Compress JPEG tool on GoPDFGo, depending on your original file extension.
- Step 2: Upload Your Photo Securely. Select the image from your phone's photo gallery or drag and drop it from your desktop computer. Our tools are designed to process everything locally inside your browser. Your personal identification photo remains completely private and is never uploaded to an external server.
- Step 3: Adjust the Quality Slider. Unlike basic one-click tools that guess what you want, we give you manual control. You can adjust the compression slider to find the absolute perfect sweet spot between file size (getting it under 20KB) and visual clarity. Watch the estimated output size change in real-time.
- Step 4: Download and Verify. Once the tool confirms the output size is within your required 10KB to 20KB limit, click download. Open the downloaded file to ensure your face and signature are still easily identifiable.
Wait, did the portal ask for a specific physical dimension too?
File size (the weight in KB) is not the only technical hurdle. Many strict portals like SSC CGL or UPSC also demand exact physical pixel dimensions, such as specifically stating: "Photograph must be exactly 200 pixels wide by 230 pixels high."
It is vital to know that compressing the file's weight will not change the physical dimensions or shape of the image. If your original high-resolution photo is 3000x4000 pixels, compressing it to 15KB will just result in a very blurry 3000x4000 pixel image, and it will still fail the portal's upload check.
If the application portal specifies a strict height and width, you must use our Resize Image tool first to set the exact pixels. Once the image is perfectly resized to the correct shape, check its weight. If the resized file is still above 20KB, then you should take that new file and run it through the compression tool.
By using the right, calculated combination of resizing and compressing, you can confidently ensure your application sails through the strictest technical checks without a single hitch. Get your documents right the first time, avoid the stress of last-minute rejections, and focus all your energy on preparing for your actual exam!
Frequently Asked Questions
Q: How do I compress a photo under 20KB for an SSC or UPSC form?
A: Open the Compress JPG tool, switch to Target Size (KB) mode, and pick 20 KB (or type any number). The tool lowers quality and, if needed, resizes the photo until it fits under that limit.
Q: Do I need to resize the photo as well as compress it?
A: Often, yes. Weight (KB) and dimensions (pixels) are separate things. If your form asks for an exact size like 200x230 pixels, set that first in the Resize Image tool, then compress the resized file under the KB limit.
Q: Will a 20KB photo look too blurry to be accepted?
A: At the correct pixel size, a well-compressed 20KB photo stays clear enough for form verification. Blurriness usually comes from compressing a huge photo without resizing it to the required dimensions first.
Q: Is it safe to compress my photo and signature here?
A: Completely. Everything runs inside your browser on your own device — your photo and signature are never uploaded to any server.
Q: What size does my signature usually need to be?
A: Many exam forms ask for a signature around 140x60 pixels and under 10-20KB, but always check your official notification. Resize to the exact pixels first, then compress to the required KB.