How to Put Aadhaar Front and Back in One PDF for KYC
How to Put Aadhaar Front and Back in One PDF for KYC
Putting your Aadhaar front and back in one PDF is the exact thing a bank or KYC form asks for, usually at the worst moment. You are halfway through opening an account, you hit the field that says "Upload Aadhaar (front and back) as a single PDF," and the form only accepts one file. You have a photo of the front somewhere in your gallery, the back is missing, and now you are stuck.
It takes about two minutes and you do not need any app. The whole thing runs in your browser, so your Aadhaar photos never leave your phone or laptop. For a document this sensitive, that is worth caring about.
Why KYC Forms Insist on a Single PDF
Banks, mutual fund portals, SIM re-verification desks, and most government KYC flows ask for both sides of Aadhaar because each side carries different information. The front has your photo, name, date of birth, and the Aadhaar number. The back has your address and the QR code. A form that only takes the front is incomplete for address proof, which is usually why they asked for Aadhaar in the first place.
They want one file instead of two images for a practical reason. Their staff opens a single attachment, sees front then back, and moves on. Send two separate JPGs and one often gets lost, attached to the wrong record, or downloaded out of order. A single ordered PDF removes that confusion, and it is the format their upload field is actually built to accept, so you skip the "file type not supported" rejection.
Take Two Clean Photos First
Before you combine anything, get the two source photos right. A bad scan of Aadhaar gets a KYC application sent back, and re-doing it can cost you a few days. Place the card flat on a plain, dark surface like a wooden table. A dark background makes the white card stand out and keeps the edges sharp.
- Shoot in daylight near a window. Skip the camera flash, since it throws a white glare across the laminated card and washes out the Aadhaar number.
- Hold the phone directly above the card, parallel to it, so the card comes out as a clean rectangle and not a slanted shape.
- Fill most of the frame with the card, but leave a small margin so no corner gets cut off.
- Click the front first, then flip and click the back. Check both before you move on. The number and address must be readable when you zoom in, not a grey smudge.
If a photo came out with too much table around it, trim it with the Crop tool so only the card remains. Cleaner input gives you a cleaner final PDF.
Combine Both Sides into One Ordered PDF
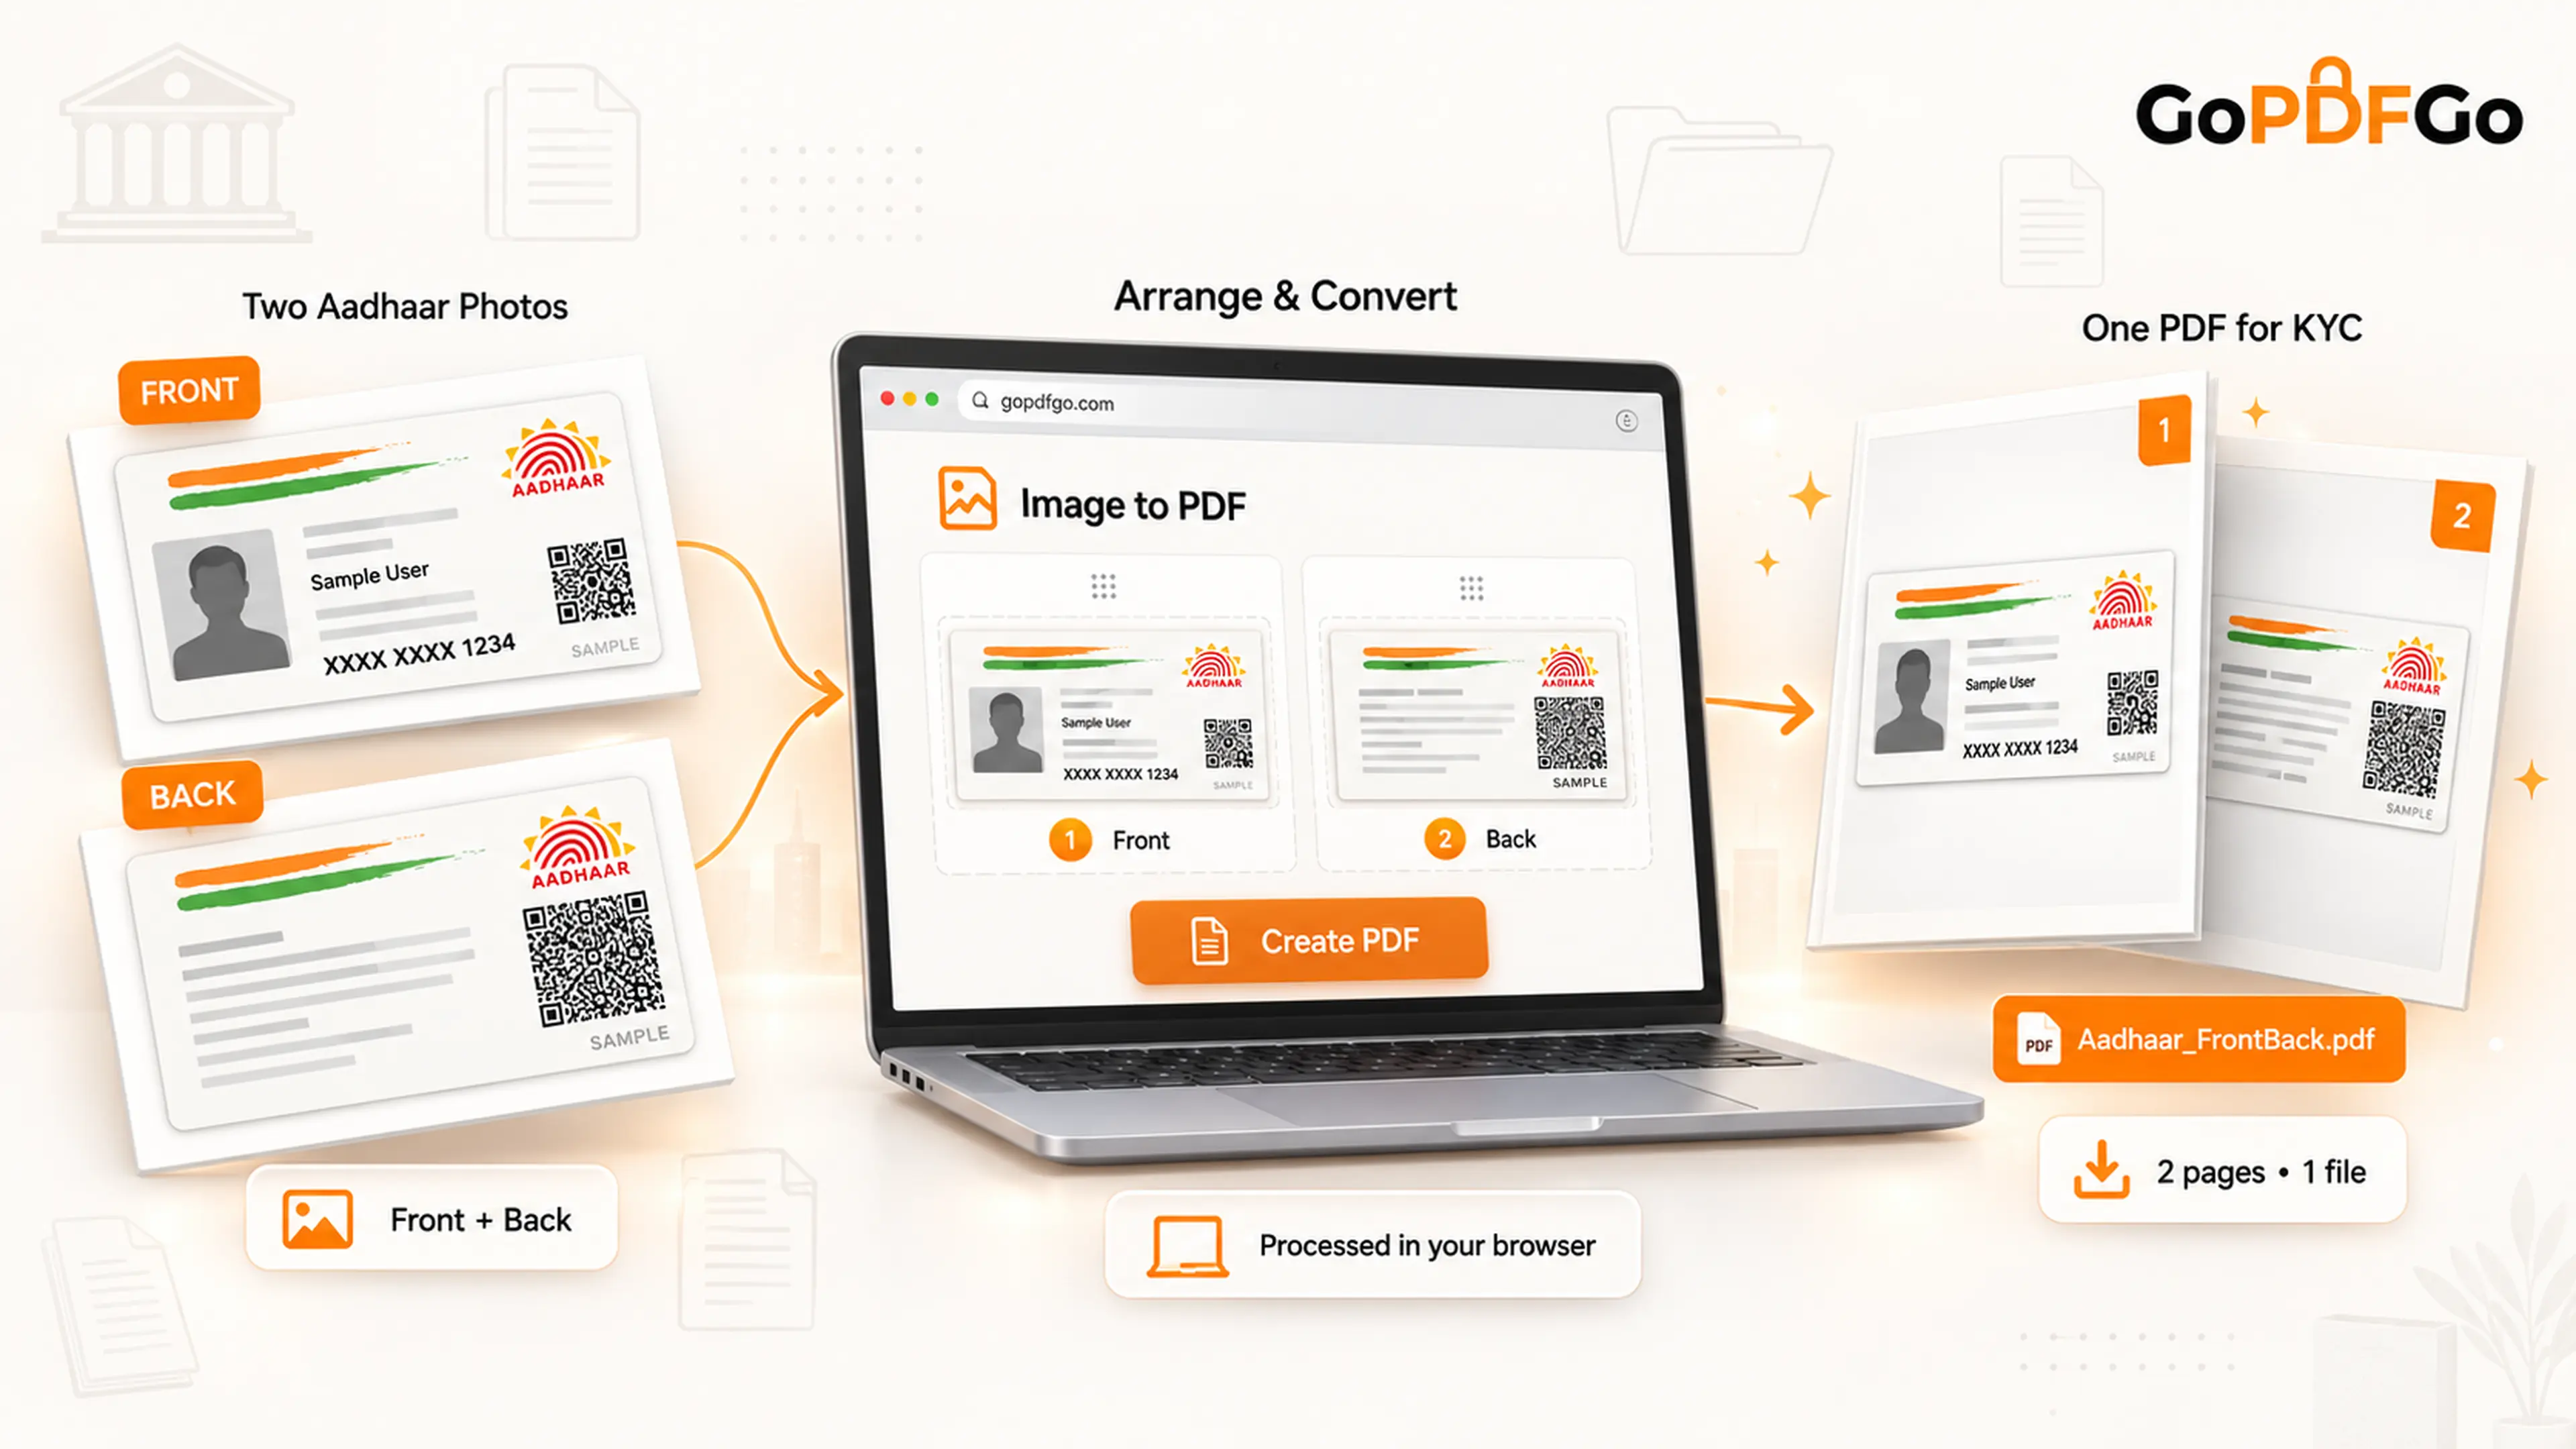
Now you have two photos: front and back. The job is to stack them into one PDF in that exact order. The Image to PDF tool does precisely this. It takes your photos and combines them into a single ordered PDF, entirely inside your browser, with no upload to any server and no watermark stamped on top.
Make your single Aadhaar PDF:
- Step 1: Open the Image to PDF tool in your phone or laptop browser.
- Step 2: Add both photos. Select the front and the back together from your gallery, or add them one at a time.
- Step 3: Check the order. The front should sit as page 1 and the back as page 2. If they loaded the wrong way around, drag the thumbnails to swap them.
- Step 4: Generate the PDF. The tool stitches both images into a single two-page file in seconds.
- Step 5: Download and rename it something clear like "Aadhaar_FrontBack.pdf" so you can find it instantly when the upload field opens.
One file, both sides, in the right order, ready to attach. Because everything happens locally, your Aadhaar image is never sitting on some random website's server waiting to be leaked.
Keep the File Small Enough to Upload
Phone cameras shoot big photos these days, often a few MB each, and two of those combined can push your PDF past the size limit many KYC portals enforce. Those limits vary by portal, and some run as tight as a couple of hundred KB, so check the exact number your form shows. If the form rejects your file for being too large, do not re-shoot the photos at lower quality. Make the full PDF first, then run it through the Compress PDF tool. It shrinks the file while keeping the number and address sharp enough to pass verification.
Be careful not to over-compress. If you squeeze the file so hard that the Aadhaar number turns fuzzy, the KYC reviewer cannot read it and your form bounces. Aim for the smallest size where you can still zoom in and read every digit cleanly.
If You Are Sharing It Outside Official KYC, Mask It First
Official bank or government KYC needs your full, unmasked Aadhaar, so leave it as is for those. But the moment you send Aadhaar to a landlord, a coaching centre, a private gym, a courier, or any non-government party, you should hide the first eight digits of the number. UIDAI itself permits masked Aadhaar for most address-proof purposes, and your full number sitting in a stranger's WhatsApp is a genuine risk.
Run the front through the Aadhaar Masking tool before you combine the sides. It blacks out the first eight digits and leaves only the last four visible, which is enough to prove identity without handing over the whole number. Then combine the masked front and the back into your single PDF the same way as above.
A Few Honest Limits
This method makes a clean image-based PDF, which is exactly what KYC desks want. It will not improve a blurry photo, so if your source shot is unreadable, the PDF will be too. Re-shoot it rather than hoping compression saves it. A few strict government portals occasionally ask for a self-attested copy, meaning you sign across the photocopy. In that case, print, sign, photograph the signed copy, and then make your PDF. For the vast majority of online KYC, the two-photo method here is all you need.
Once you have done this once, the next form is quick. Two photos, drop them in front-then-back, export one PDF, compress if needed. That is the whole routine.
Q: Does the front have to be page 1 and the back page 2?
A: Yes, keep the front first. Reviewers expect to see your photo and number first, then the address on the back. If they loaded in the wrong order, drag the thumbnails to swap them before exporting.
Q: Is it safe to make my Aadhaar PDF on a website?
A: With the Image to PDF tool here, yes, because the work happens inside your own browser and the photos are never uploaded to a server. Avoid any site that sends your Aadhaar image to the cloud for processing.
Q: My KYC portal rejected the PDF for being too big. What do I do?
A: Make the single PDF first, then pass it through the Compress PDF tool to bring it under the portal's size limit. Stop compressing the moment the Aadhaar number is still clearly readable on zoom.
Q: Should I mask my Aadhaar for bank KYC?
A: No. Official bank and government KYC needs the full, unmasked number. Mask it only when sharing with private parties like landlords, gyms, or coaching centres.
Q: Can I add my PAN or photo to the same PDF?
A: A KYC field asking specifically for Aadhaar front and back wants only those two pages. Keep this PDF strictly to the two Aadhaar sides, and make a separate file if the form asks for other documents.