How to Add a Cover Page to a PDF Report or Project
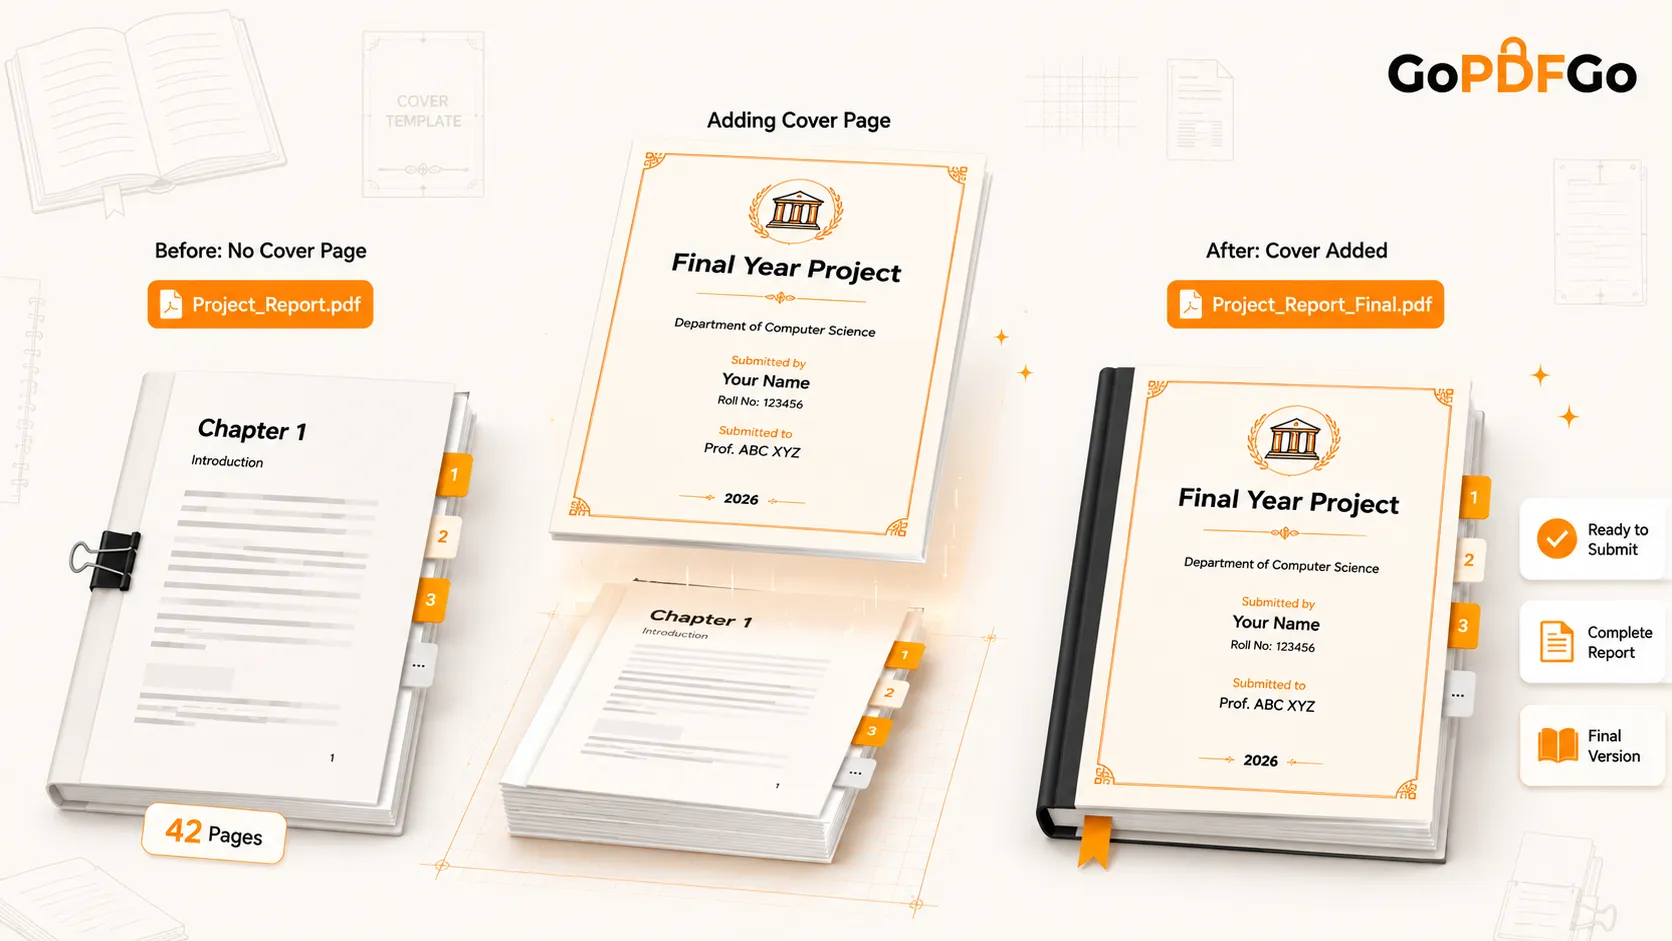
You finished the report. Forty pages of a final-year project, an internship report, maybe a client proposal. You exported the whole thing to PDF and then noticed the obvious gap. There is no cover page. No title, no your name, no college logo, no "Submitted to Prof. So-and-so." Page one is just chapter one.
So do you go back into that giant Word file, insert a page at the very top, fight the formatting that always shifts when you add a page, and re-export all 40 pages again? No. The cover is one page. The report is already a clean PDF. You only need to glue one in front of the other, and that is a two-minute job.
The simplest way to think about it
A cover page is a separate document until you decide otherwise. So treat it like one. Make your title page as its own one-page PDF, keep your report PDF exactly as it is, and then put the cover first and the report second. Stack them in that order and merge. That is the whole trick. You are not editing the report. You are not touching a single comma inside those 40 pages. You are adding one sheet to the front of the pile.
This matters because re-exporting is where things break. Word repaginates, your carefully placed figure jumps to the next page, the heading styles drift, and now you have three new problems you did not have ten minutes ago. Leave the report PDF untouched and all of that goes away.
First, get your cover page as a PDF
You have a few honest options here, depending on how your cover was made. Pick whichever matches your situation.
- You designed it in Canva or something similar. Plenty of students grab a free cover template off Canva because it looks nicer than a plain Word page. Canva exports straight to PDF, so download that single page as a PDF and you are set. Same for a cover built in PowerPoint or Google Slides.
- You have the cover as an image. Maybe a friend designed it, or you got a JPG with the college logo and a border. An image is not a PDF, so convert it first with Image to PDF. Drop the JPG or PNG in and it comes out as a clean one-page A4 PDF you can merge.
- The cover sits inside the big Word file but the report is already PDF. Open the Word doc, go to Print, set the range to that one page ("current page" or "page 1"), and save as PDF. Now you have a standalone cover without re-exporting the whole thing.
- You want to keep it plain. A simple typed cover in Word, exported as a one-page PDF, works perfectly well. Examiners care that the details are correct, not that the page sparkles.
Whatever route you take, the goal is one thing: a single PDF that is your cover page, sitting in your Downloads folder, ready to go.
Now merge the cover in front of the report
This is where the order does all the work. The tool keeps whatever sequence you arrange, so the cover goes on top of the stack and the report follows.
Adding your cover page with Merge PDF
Everything here runs inside your browser. The project file and the cover never leave your laptop, which is reassuring when the report carries your name, roll number, and sometimes a company's internal numbers.
- Step 1: Open the Merge PDF tool on GoPDFGo.
- Step 2: Add your cover-page PDF first, then add the full report PDF. You can drop both in together.
- Step 3: Check the order in the preview tiles. The cover should be first, the report after it. If they loaded the wrong way around, drag the cover tile to the front.
- Step 4: If the cover came in sideways from a scan, tap the Rotate button on its tile to set it upright before merging.
- Step 5: Click Merge PDF Now and download. Open it once to confirm page one is your cover and page two is where the report begins.
That check at the end takes five seconds and saves a fair bit of embarrassment. Open the merged file, look at page one. If it is your title page, you are done.
Page numbers, the right way round
Plenty of college rubrics and internship report formats want numbered pages, and printed reports almost never number the cover. Here is the part people get wrong: do not merge first and number after. GoPDFGo's Add Page Numbers tool stamps a number on every page, starting from one, with no option to skip the first page or start later. Number the merged file and your cover ends up wearing a "1," which looks off.
So flip the order. Number the report first, while it is still on its own, then prepend the un-numbered cover with Merge PDF. The cover was never in the file when numbering ran, so it stays clean, and your chapters carry the numbers. If you have already merged and want a more controlled setup (cover blank, numbering starting from the real page one), the longer split-and-rejoin route is laid out in our guide on adding page numbers to a college project PDF. For most submissions, numbering before you prepend is enough.
If the merged file turns heavy
If the report was full of scanned diagrams or high-res photos and the cover came from a detailed Canva design, the merged PDF can swell to 15 or 20 MB. That is a problem when the college portal caps uploads at 5 MB, or when Gmail starts grumbling at the attachment. Run the finished file through Compress PDF and it drops a lot while the text stays sharp. Do this last, after merging, so you compress once and not twice.
The freelancer version of the same job
This is not only a student thing. Say you run a small design or consulting gig and you send out quotations and proposals. The quote itself often drops out of an invoicing app or a spreadsheet as a plain PDF. Functional, but flat. A branded cover with your logo, your tagline, and "Proposal prepared for [client]" makes the whole thing read like a studio sent it, not a guy with a laptop at a cafe.
The steps do not change. Build the cover once in Canva, keep it as a reusable one-page PDF, and put it on the front of every proposal with Merge PDF. You design it a single time and reuse it for the next ten clients. They see a clean front page before they reach your numbers, and that first impression on a quote does real work.
A couple of things this will not do
Let me be straight about the limits. Merging puts the cover in front of the report, but it does not redesign the cover for you. If the title page itself looks rough, fix that in whatever tool you made it in. Merge only handles the stacking.
Also, if the report PDF is password protected, say you pulled it from a portal that locked it, you will need to remove the password with Unlock PDF before merging, because locked files cannot be combined. And merging keeps each file at its own page size. If the cover is A4 and the report is Letter, they merge fine but the page dimensions differ a touch. Nobody notices on most submissions, but if your guidelines are strict, match the cover's size to the report before you make it.
FAQ
Q: Will adding a cover page change anything in my actual report?
A: No. Your report's text, figures, and formatting stay exactly as they were. You are only placing a new page in front of it, so nothing inside the report shifts.
Q: My cover is a JPG, not a PDF. Can I still merge it?
A: Not directly. Convert the JPG to a PDF first with Image to PDF, then merge that one-page PDF in front of your report.
Q: How do I number pages but leave the cover unnumbered?
A: Add page numbers to the report on its own first with Add Page Numbers, then prepend the cover using Merge PDF. The cover is never in the file while numbering runs, so it stays clean.
Q: The merged file is too big for my college upload portal. What now?
A: Run the finished merged PDF through Compress PDF as the last step. It brings the size down a good bit while keeping your text and diagrams readable.
Adding a title page really is just stacking one PDF in front of another in the right order. Make your cover, open Merge PDF, put the cover first, and the report is ready to submit. Worth the two minutes before you upload.